

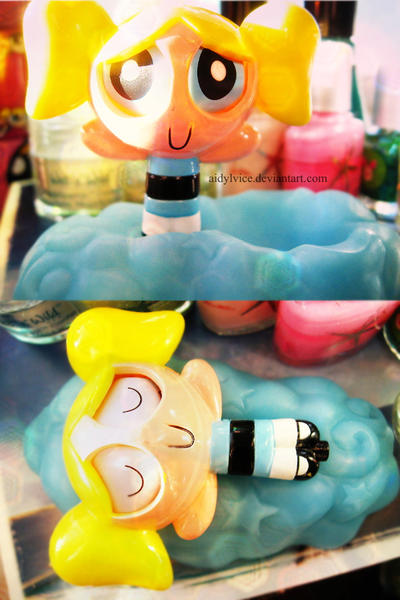
This is the photo I'll be working on. See? It's not too shabby of a photo, but it could use a little boost to the color as well as the sharpness of the image. Also, the background could use a little more blurring. Let's get started!
The first thing I'm going to do is work on the color. The fastest way I found to do this on photos (where you may be editing a bunch in bulk) is to use the Brightness/Contrast tool. The brightness and contrast of photos have been edited since the beginning of photography!

After you have the tool open, adjust the brightness level to +30, and then adjust the contrast level to +30. According to your photo, these levels will differ.

And the above is what it will look like after you brighten and contrast it! Another way to do get similar results is to use the screen/soft light technique on the layers. In that, you just duplicate the main layer once and set it on screen. Then you duplicate the main layer again and set it to soft light.

And the above is the result! Not much difference, but the brigtness/contrast tool can be use faster. Ok, now for the sharpening of the image.

After you open the "sharpen" box, adjust the sharpness to 30. I generally use 30 as a rule of thumb for all my photos but, again, it's according to the photo. Just remember not to sharpen your photos too much, or they'll get really grainy looking. On to blurring!

Select the blur tool on your GIMP toolbox, then in "convolve type" select blur. I like to use a fuzzy brush for my blurring tool, but really whatever brush your comfortable with will work. One key to blurring the background of an image is to NOT blur any of the lines of your main focal point. In this photo, I want Bubbles and the cloud she is staying on to stay front and center. So I need to be careful when blurring the background not to blur the edges of her.

And that's what it will look like when you're done! If you want to add some bokeh textures, now would be a good time (I'll show you how I do this in another tutorial). I use these techniques generally in all my photos.
Above is the finished Bubbles project! I edited the brightness of this one a lot more, so this is why it looks different than the example. If you have any questions, or you would like to request a tutorial, please comment below and I'll get back to you. :)


No comments:
Post a Comment